


In a previous post (here), I walked through how I've set up Cypress and write tests. This time, we'll take our end-to-end testing to the next level.
Running your tests locally can be a passable way to detect regression and bugs, but ideally we want our Cypress tests to run automatically when we push code to Github, merge branches, or deploy. I'll be demonstrating an overview of how to set up Cypress in Github Actions, by running the app in a docker container.
We'll walk through:
- Configuring Github Actions
- Publishing our API to the Github Container Registry
- Writing the Cypress GH action
I am using a React frontend, a Node/Feathers API, and PostgreSQL -- so some details of this guide will assume the default ports n' such of those technologies. Feathers is great, check out the latest release here!
Server Side
We're configuring Cypress client-side, but we need an API and database to run the frontend with. To do this, we'll need to publish our API to Github's Container registry (here). Let's stand that up first!
Github Actions Setup
Ensure you have admin access to your repo, then from the repo's top navigation, select Settings > Secrets > Actions. More here
You'll need a Docker Hub account, go here to create one.
Then, add these environment variables:
- DOCKER_HUB_USERNAME: Your Docker Hub username
- DOCKER_HUB_PASSWORD: Your Docker Hub password
Writing The Action
Let's write the action that Github will use to publish the API's Docker image. This will give it somewhere to live, so that we can grab it later when we want to run our Cypress tests.
In your API repo, start by creating a .github folder, then a nested workflows folder (if this is your first action).
Add a YAML file titled ghcr_publish.yml, and add your repo and org names to the following code:
Push this code to your specified branch, then look for your-api-package under your organization's Packages tab.
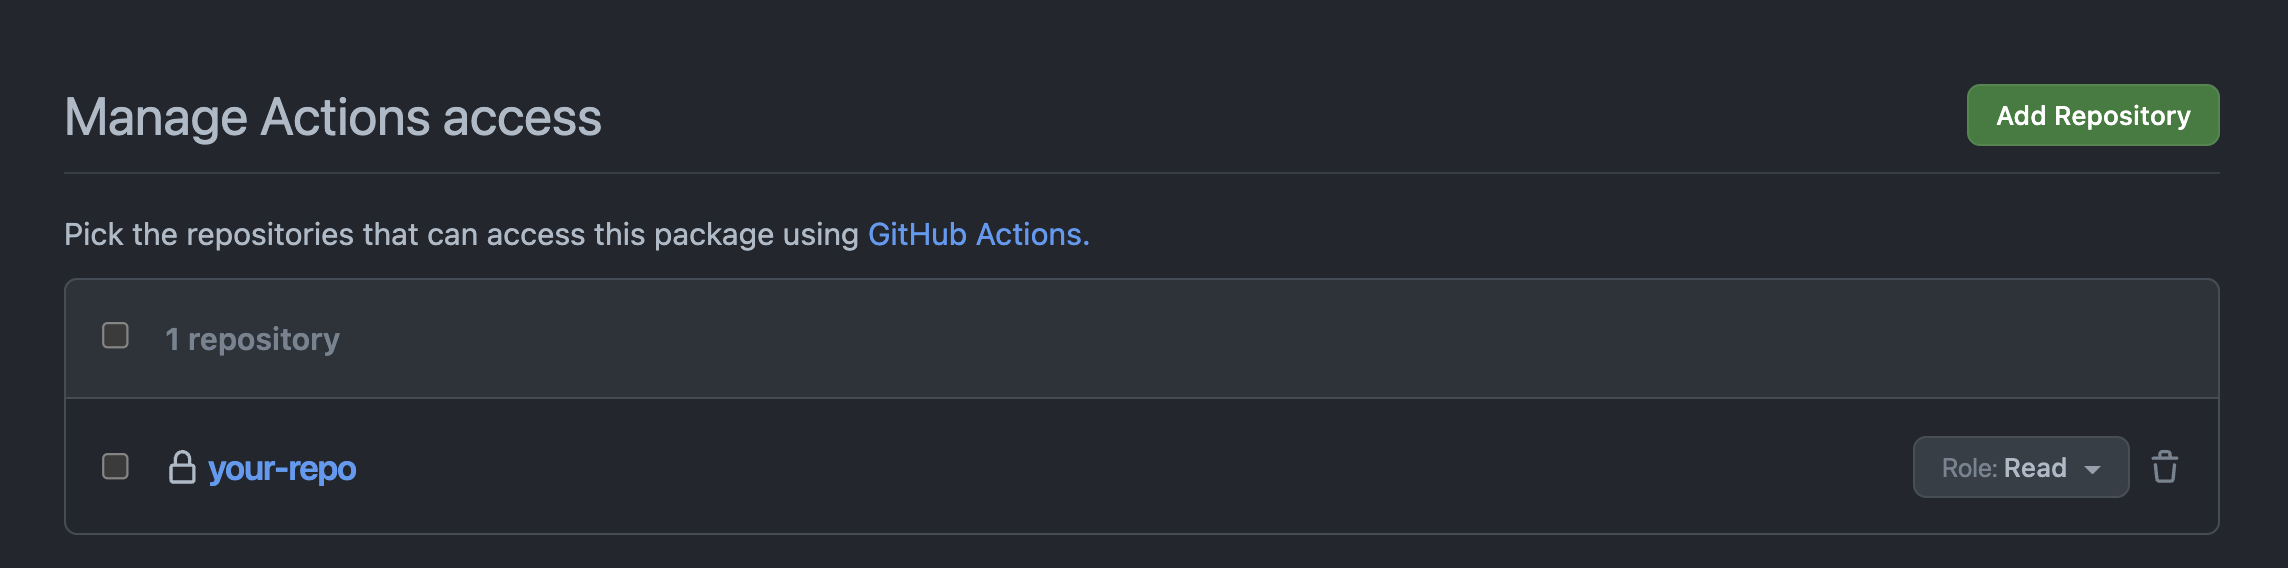
Setting Access Permissions
Navigate into your new package and click Package settings in the bottom-right sidebar. Add read permissions for your repo, and possibly also your Github account if it's not already added.
Your package settings should look something like:
Client Side
Github Actions Setup
Ensure you have admin access to your repo, then from the repo's top navigation, select Settings > Secrets > Actions. More on actions setup here.
Add these environment variables:
- CYPRESS_HOST: http://127.0.0.1 (or localhost)
- CYPRESS_PORT: 3001 (or, just not the same port that your app is running on!)
Docker Configuration
Let's configure the containers and images that the app will use with Github's Container registry.
Add a docker-compose.yml file to your cypress folder, and tweak this code for your stack:
Writing The Action
Start by creating a .github folder, then a nested workflows folder (if this is your first action).
Add a YAML file titled cypress.yml, and follow Cypress's GH Actions docs here
Your YAML file should end up looking something like this, depending on your naming conventions and API setup.
Trying it out
Commit and push your code to Github's main branch, or one of the branches that you specified in cypress.yml. You should be able to see your Cypress Tests action in the Actions tab of Github, as well as the log of its results! This may require some troubleshooting to get your tests passing in CI.
Once the action completes successfully, the overall flow should look like this:

Experiencing flaky, intermittently failing Cypress tests? Check out my tips in the section of my post here!
It might seem like a great deal of work to make a tool automatically click through an app, and it kind of is! But the benefits of having a process that can repeatedly detect regression and bugs by doing the same workflows as your users is invaluable. A huge thanks to Justis Gipson for his dev ops expertise, which inspired and guided me to write this guide.


